Users and Roles
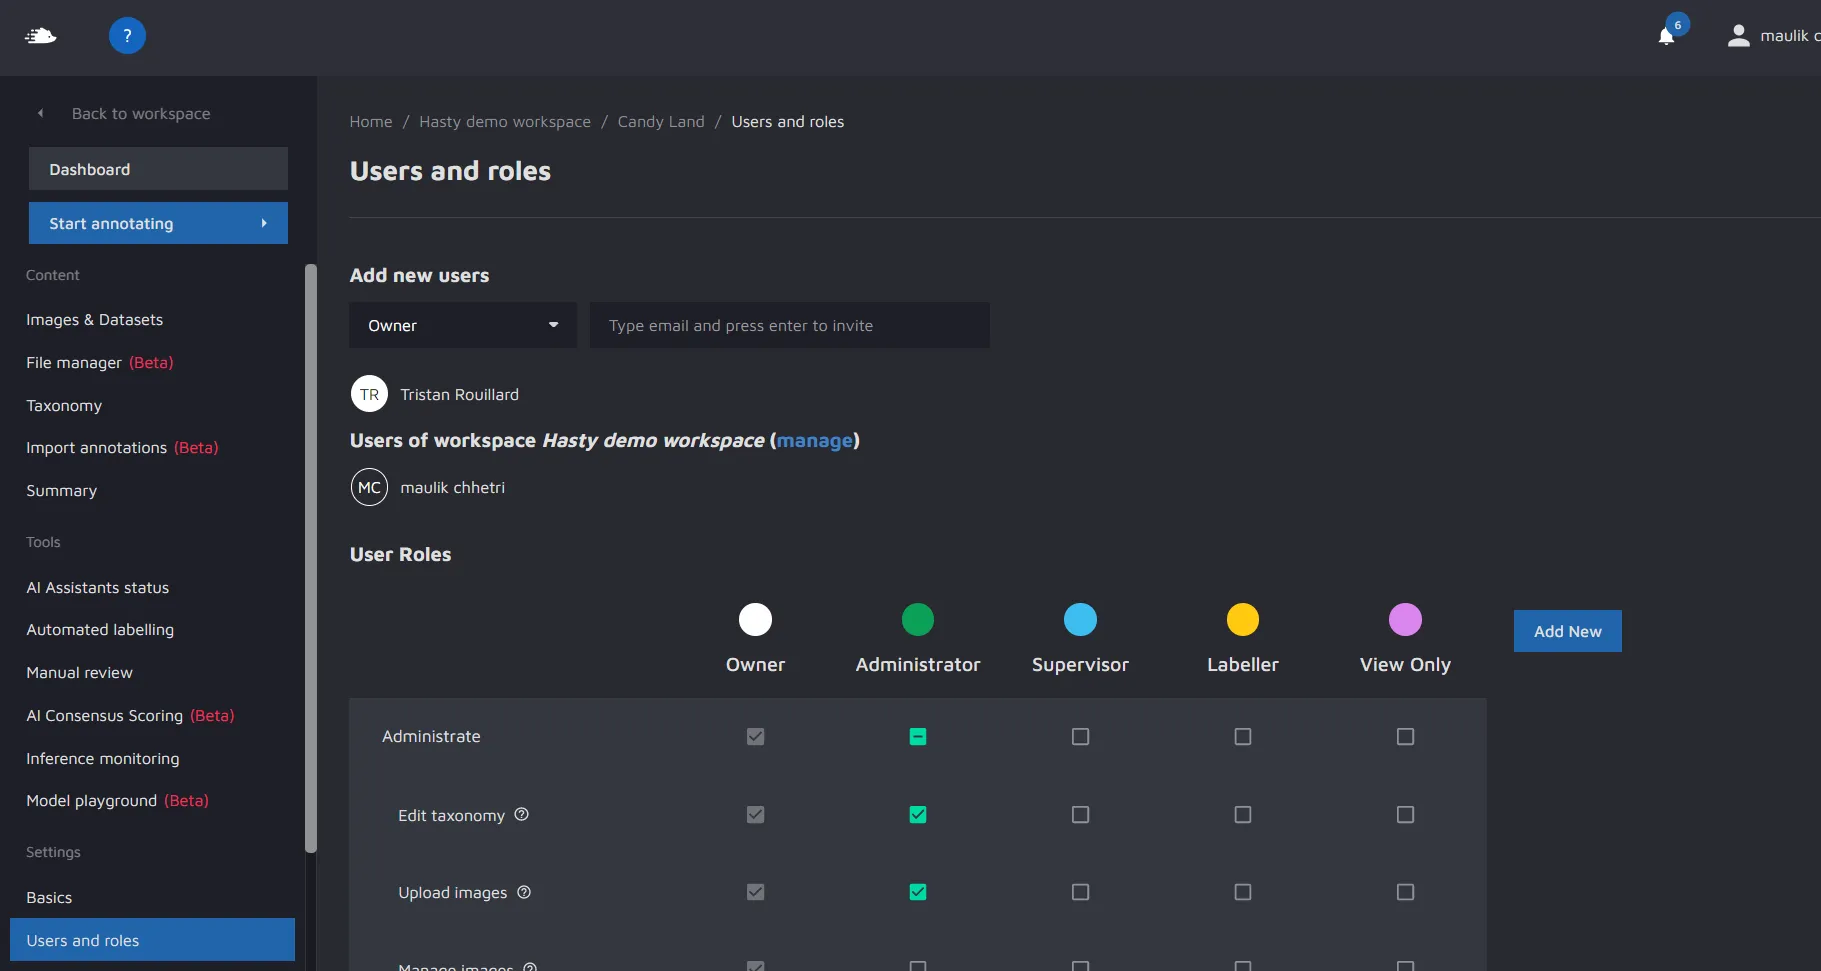
On this screen, you can control who can do what in your project. It consists of two parts. At the top, we have Users where you can invite a user and assign them a role. At the bottom, we have User roles, where you can set up what each role should be able to do.
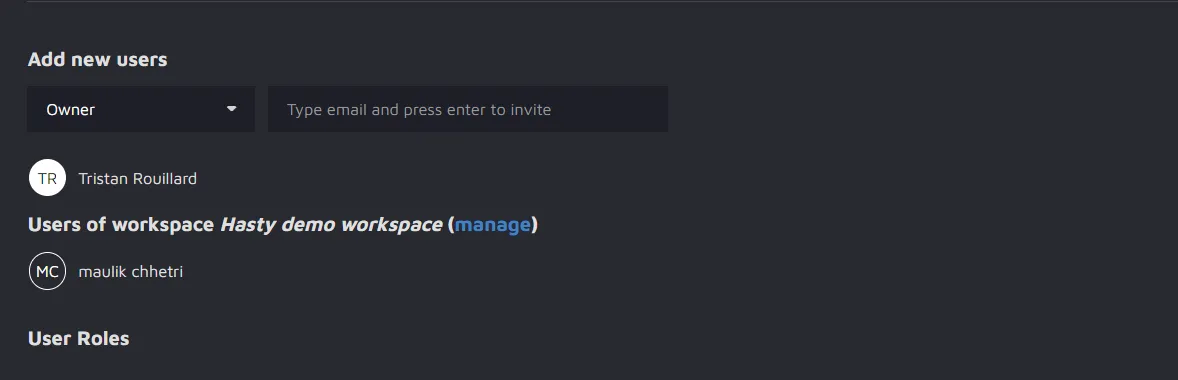
Inviting a new user
To invite a new user, first select a role from the dropdown. Then, fill in a valid email address. Press "Enter". An invite will be sent to the specified email.
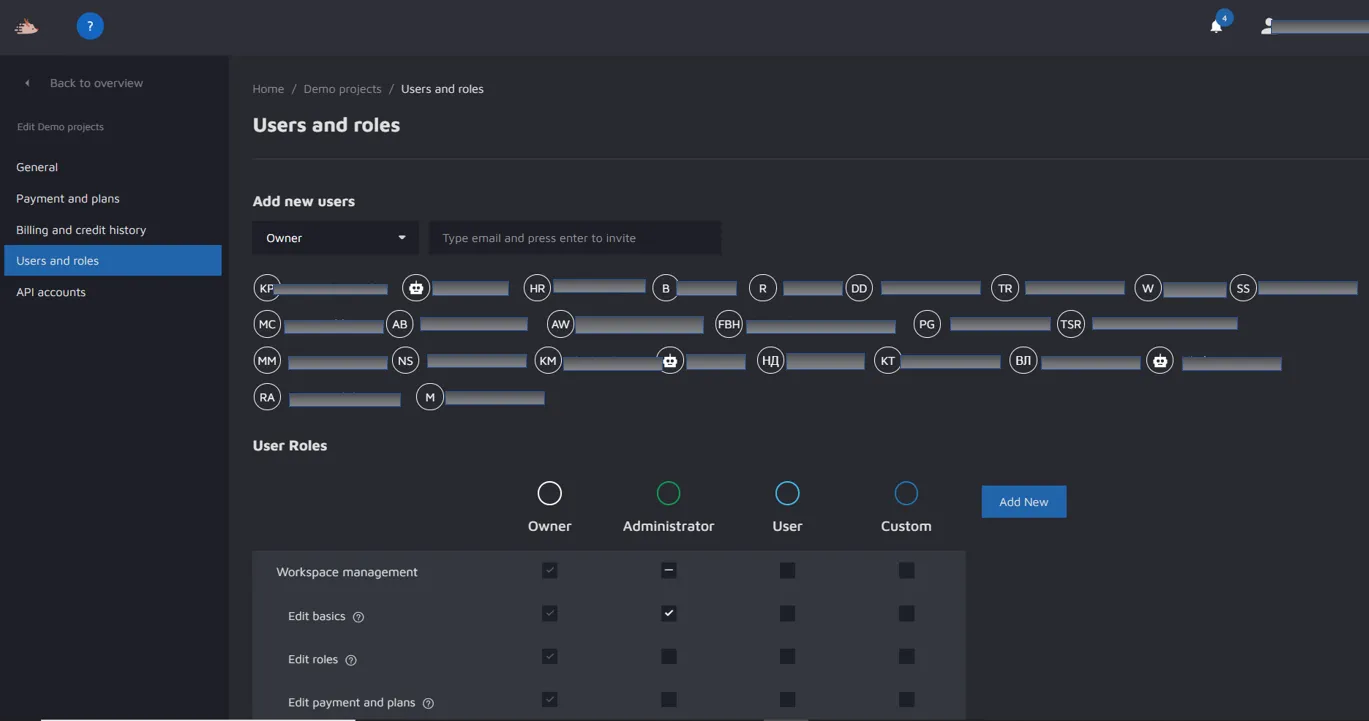
Managing Users in a project
To manage the users in the project, click on the "manage" link.

You will reach the following page:
Removing a user from your project
To remove a user, hover over the user name, and then click the "x" that appears.

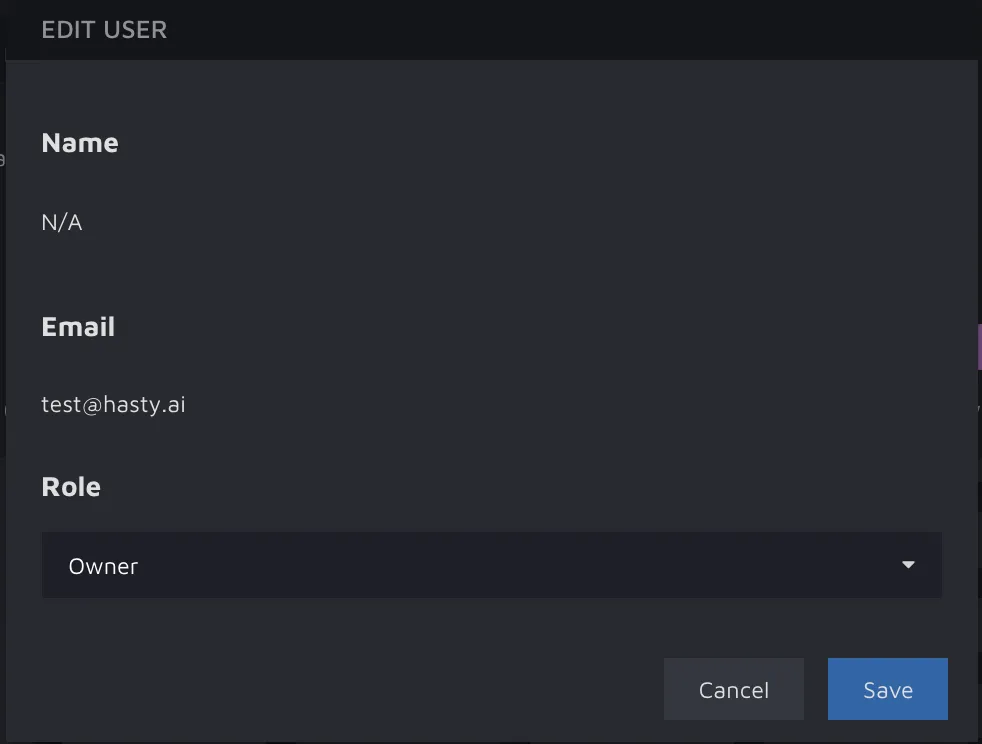
Changing the role of a user
Click on the user name. This will open an "Edit user" modal. Go to "Role" and click on the dropdown. Pick a new role. Save.
User roles
By default, you will have 5 roles added to any new project. Those are:
- Owner - the owner of the project that can do everything
- Administrator - The admin role can do most actions, but by default, not import annotations, manage roles, or use automated labeling
- Supervisor - Can perform all annotation tasks and set image status to "Done" or "To review". Also has access to "Project Summary"
- Labeller - can perform annotation tasks
- View Only - can only view the project (see annotations and images)
Change role permissions
You can change what any given role can do by clicking on the checkbox for any permission in the role row.
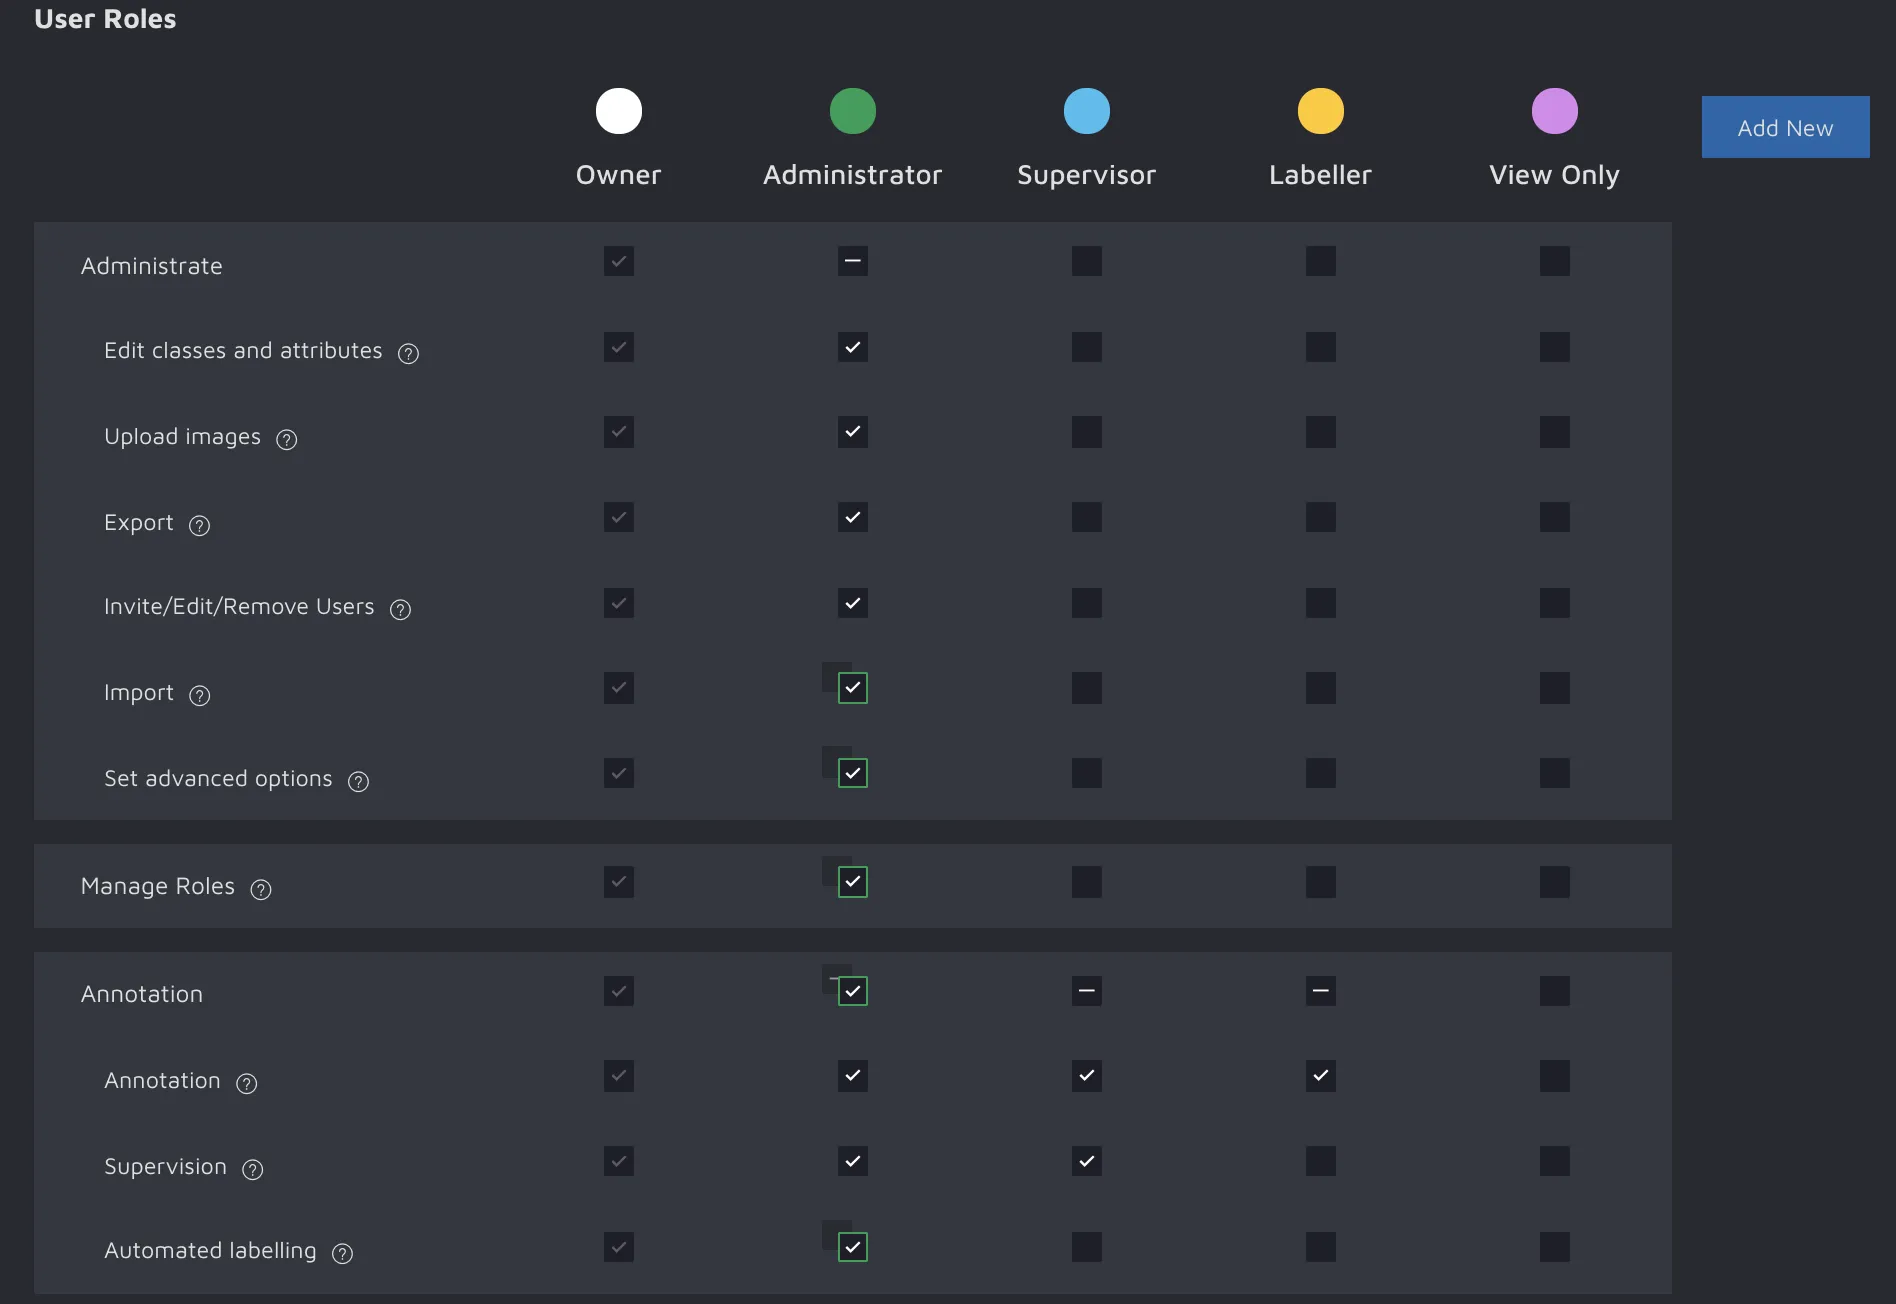
When you've made your changes, don't forget to "Save" (which can be found at the bottom).
Add new roles
To add a new role, click the blue button to the right of the permissions table. This will open the "Create role" modal.
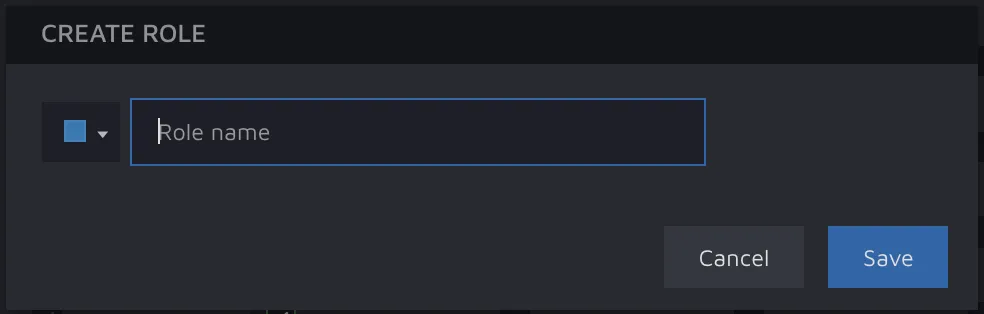
Here, you can pick a name for the role, and pick a color. The color is a helpful tool to understand which user has which role. You can see the color indicating the role of a user in various places around the app.
Remove roles
You remove roles by hovering over the name and then clicking the "X".
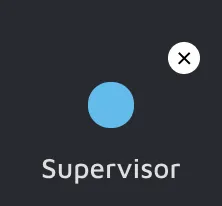
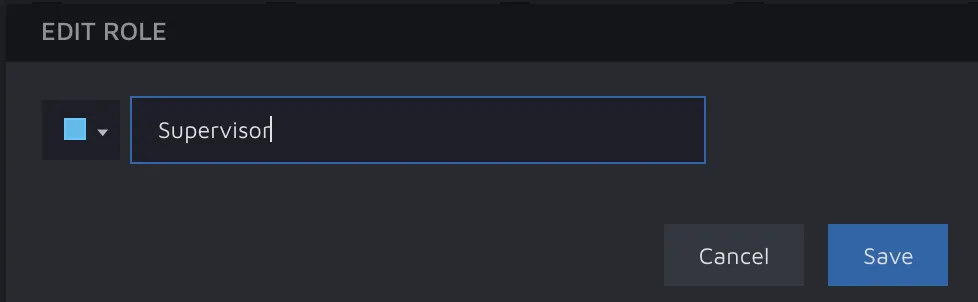
Edit roles
You can edit the name and color of a role by clicking the role name. This will open the "Edit role" modal.
Permissions
The following permissions can be set in Hasty:
- Edit taxonomy - allows users to create, edit, and delete classes and attributes;
- Upload images - allow users to upload images;
- Manage images - allows to move, rename or delete images;
- Manage Datasets - allows to create, rename or delete datasets;
- Export - gives users the possibility to export data and reports from Hasty;
- Invite/Edit/Remove users - users with this permission can invite, edit or remove users;
- Import - this permission allows users to import annotations;
- Set advanced options - users can set up advanced options;
- Webhooks - allows to create/edit/remove Webhooks;
- Manage roles - can edit permissions and create/edit/remove roles;
- Annotation - users can do any annotation task (create, edit, and remove annotations);
- Supervision - users can set images to "Done";
- Automated labeling - users can use automated labeling;
- Project summary - users can access the "Project Summary" page;
- AI Consensus Scoring - allows using the AI Consensus Scoring tool;
- Model Playground - allows using the Model Playground.